At this point, even though you may not have created any pages for your website just yet, it's still a good idea to create your main menu and apply it to the proper theme location. This way, the site will start to come together visually on the frontend, along with establishing a starting point to build from in the backend.
Menu Assignment (Menu Locations)

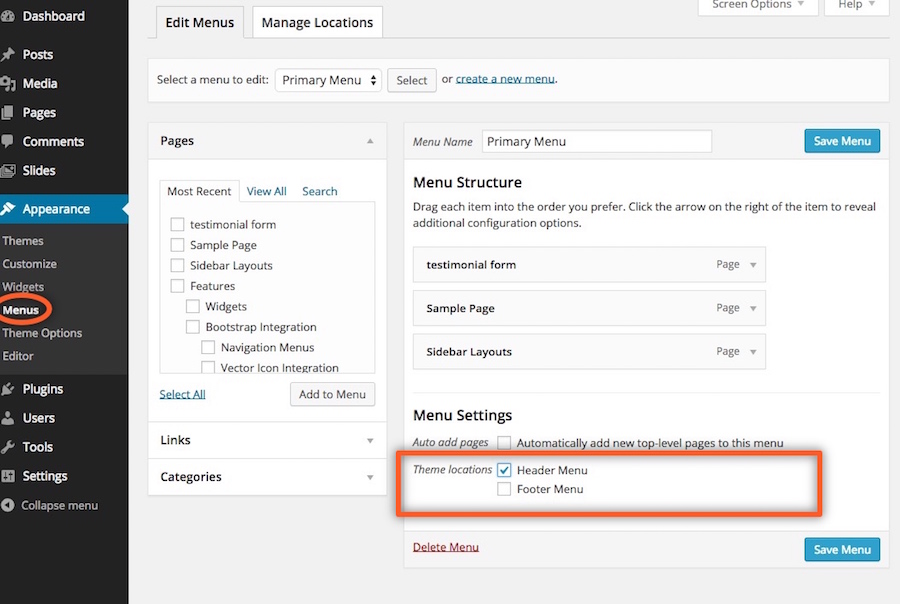
After activating one of our themes, you want to make sure that you have assigned each custom menu to a theme menu location. This can be done at the bottom of editing the menu or by going to Appearance > Menus > Menu Locations.
Go to Appearance > Menus and you will see a panel where you can create new menus. Create one, add your created pages to it (from the left side panels) and save it. After this, go to tab Manage Locations where you can select the Menu from dropdown box . Choose your newly created menu, click Save and your menu is ready. You can also specify the menu location below each menu structure.
If you already have menu’s created from your previous theme, mark the desired theme location of each one under Menu Settings.
Menu Extras
We’ve packed in some cool features in working with navigation menus that you may not be aware of that you can utilize when using WordPres’s menu builder at Appearance > Menus.
Icon Integration
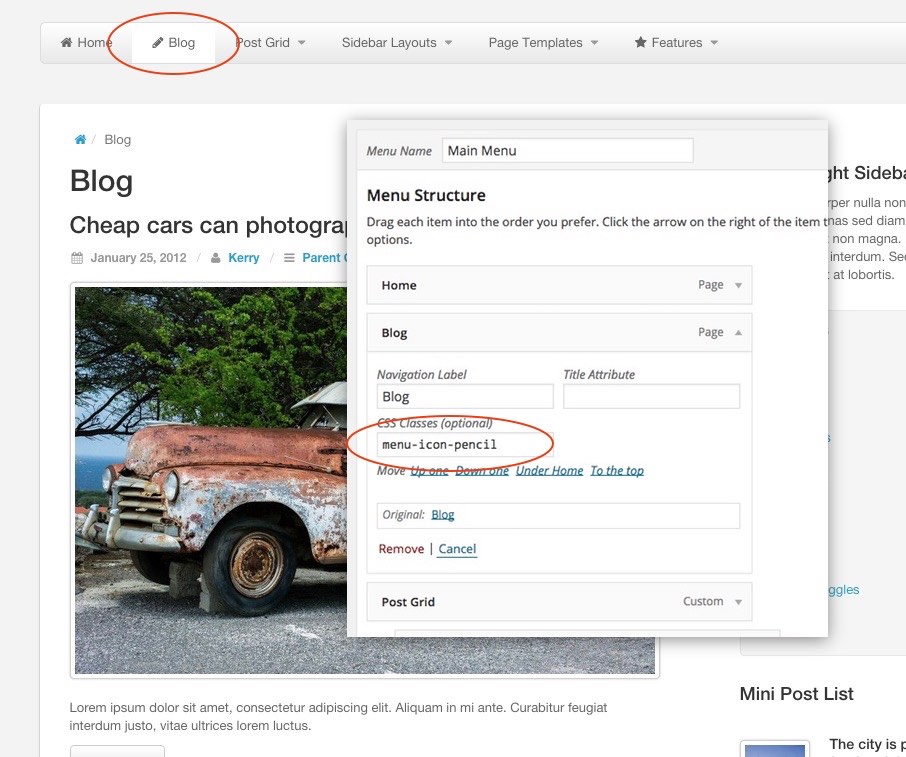
Incorporate any of the Font Awesome (up to v4.7) icons into your navigation by adding the class “menu-icon-{name_of_icon}” — Make sure this is the first class you add to the menu item if you have other CSS classes attached.

Headers and Dividers
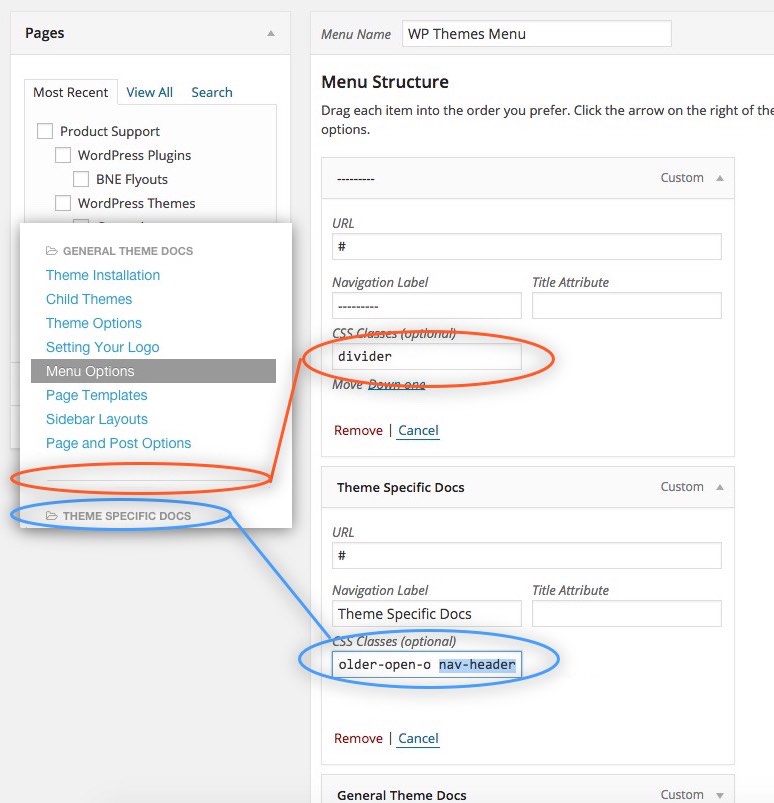
Also, you can utilize the classes “nav-header” and “divider” to do some cool things with your WordPress navigation menus. Take the menu of this documentation to the left of this page, for example.
This menu was built in WordPress’ menu builder and then inserted into the sidebar with the “Custom Menu” widget. It utilizes not only the icons discussed above, but also header and dividers.

