Google's API only allows up to 5 reviews to show and requires their branding. Using this API requires an API key using your Google account. Result are cached for 1 week (7 days).
 DJ Agbayani
 Jose Garcia
[bne_testimonials_api source="google" id="google-places-id" limit="2"]The same API can be used with the
[bne_testimonials_badge] shortcode by setting api="true" as an option.
[bne_testimonials_badge api="true" source="google" id="google-places-id"]
Creating your “Google Places API Web Service” key
In short, what you need is to create a “Project” in the Google Developer Console, then enable the API, and create credentials to use that API key with BNE Testimonials Pro.
To get an API key, you will need an active Google account, then follow these steps:
- Visit the Google Places API Web Service landing page. If you are not logged into your Google Account already, you can do so there.
- Make sure Places is checked and press continue.
- Select an existing project or create a new one.
- Enter a billing account. Beginning June 2018, a billing account is required to use the API services.
- You'll be presented with the key, copy it and go back to your site with BNE Testimonials. Navigate to Testimonials > Settings and enter your API key there. This API key does not go into the shortcode generator.
Watch a video walkthrough at the time. Some steps may be different than what is in the video
Video Walkthrough
Finding your Google Places business ID
Using this tool from Google, or the one below, you can search for your business/place ID. To get the ID, follow the steps below the map

- Visit the Web Services Place ID page or use the one below.
- In the map shown do a search for your business or landmark. Choose the one you need and you'll be shown a tooltip with the location and ID as shown in the screenshot.
- Take that ID and add it to your Testimonial shortcode in the
idargument.
Not able to find your PlaceID?
In some cases, you may come empty handed using the above tool. Google Place ID is a unique identifier for each location within Google My Business and Google Maps; however, if your business is set up as a service area or a private home residents then you may have not set a physical address. In this case you'll need to do a little digging to find it.
1. Search for your business on Google.
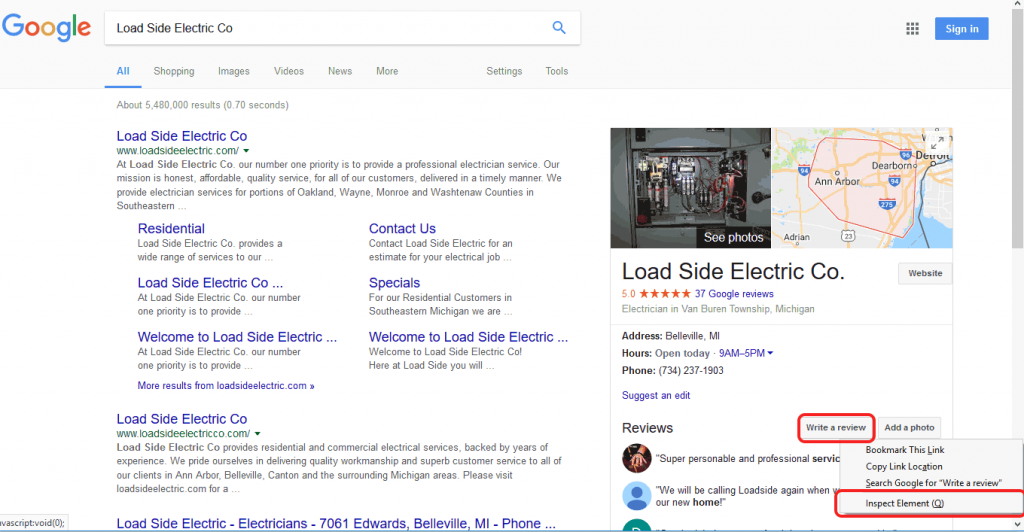
2. Inspect the “Write a Review” button. To do this in Firefox, right-click and choose “Inspect Element“. In Chrome, right-click and choose “Inspect“. (Most browsers follow a similar process.)
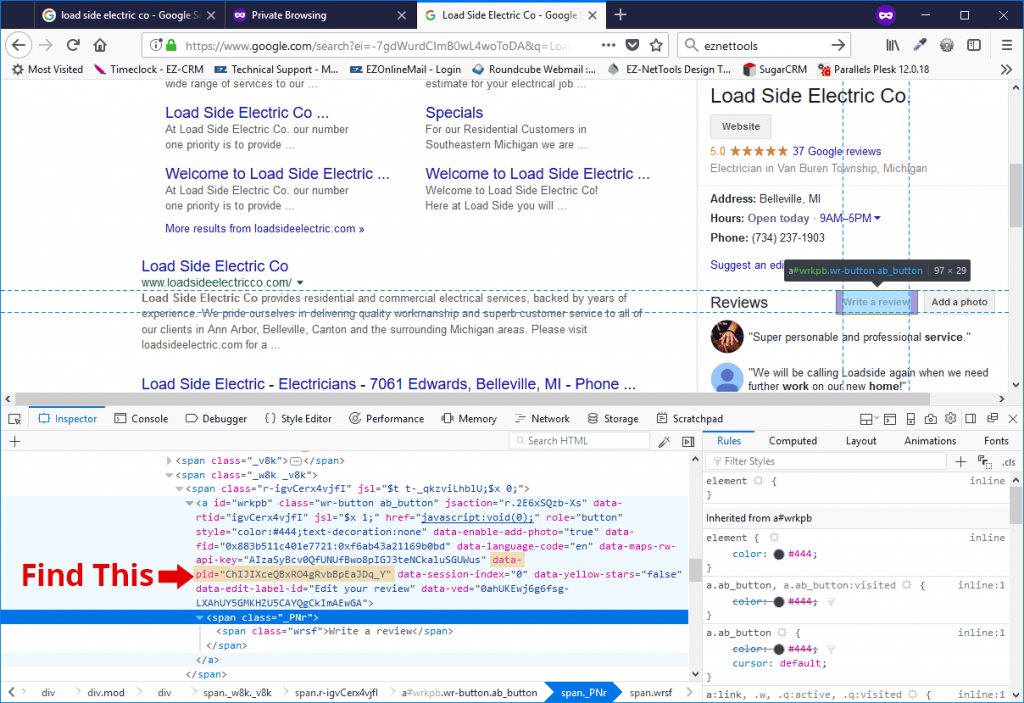
3. Find “data-pid” as shown above. (This part is a little tricky, but just look inside the <a> tag until you find data-pid=).
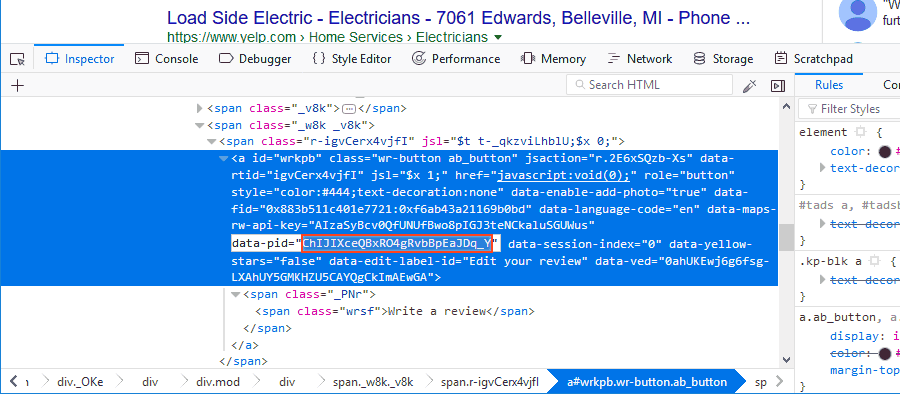
4. Copy the characters within the quotes (as shown above).
If you're still having trouble finding your PlaceID, please reach out to us and we'll help you find it.