BNE Backstretch allows you to add a single background image or rotating background images to any block level container on your website on a per page/post setting via a simple custom meta box to your pages and post edit screens.
Installation
You can install BNE Backstretch two ways, either FTP to your server and upload the bne-backstretch folder to /wp-content/plugins/ OR you can install/upload the zip file, “bne-backstretch.zip” included within the main file you downloaded.
Uploading/Installing via WordPress:
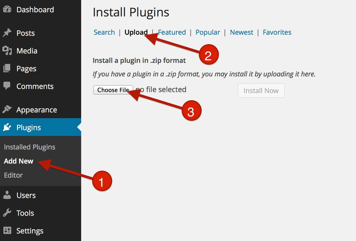
- Go To Plugins > Add New
- Click on Upload
- Click “Choose File” and drag “bne-landing.zip” (This file may be inside your downloaded zip file).
- Active BNE Landing
- Once BNE Landing is installed and activated, a new admin menu item will appear under Settings called, “Landing Page.” That is where you will enable and customize the appearance of the Landing Page.
Settings Metabox
As mentioned above, the entire control of BNE Backstretch is based per page and blog post. This allows you to really customize where your background images are placed and allows you to add different images for different pages.
Images Tab
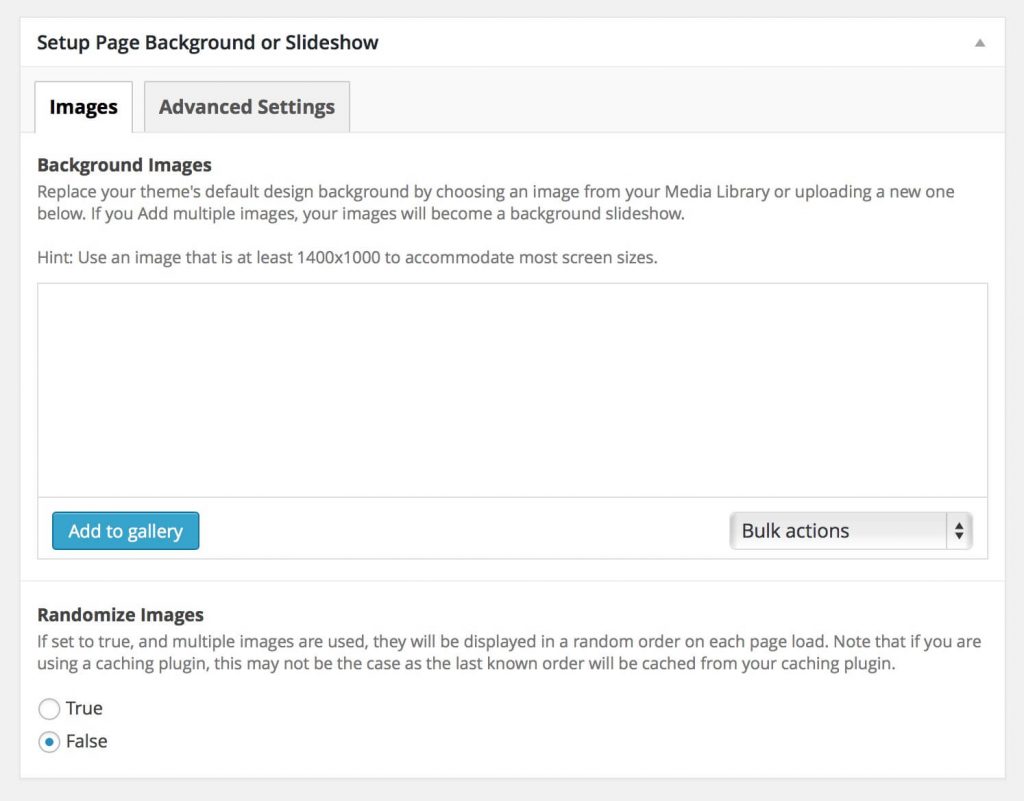 Background Images - This setting controls the image(s) that are displayed on this page. If you're using this on the page background element, you will want to use a large enough image to fill most sized monitors. A good round number is 1400x900 or 1680x1050, etc. This field allows you to also add multiple images; therefore, if more than one is added, all the images will rotate as a slideshow.
Randomize Images - This is new settings since v1.1.2. It allows you to randomize the order the images above are displayed for each page load. Note that if you are using a caching plugin that this will not truly be the case as the order markup would cached like the rest of your page.
Advanced Settings Tab
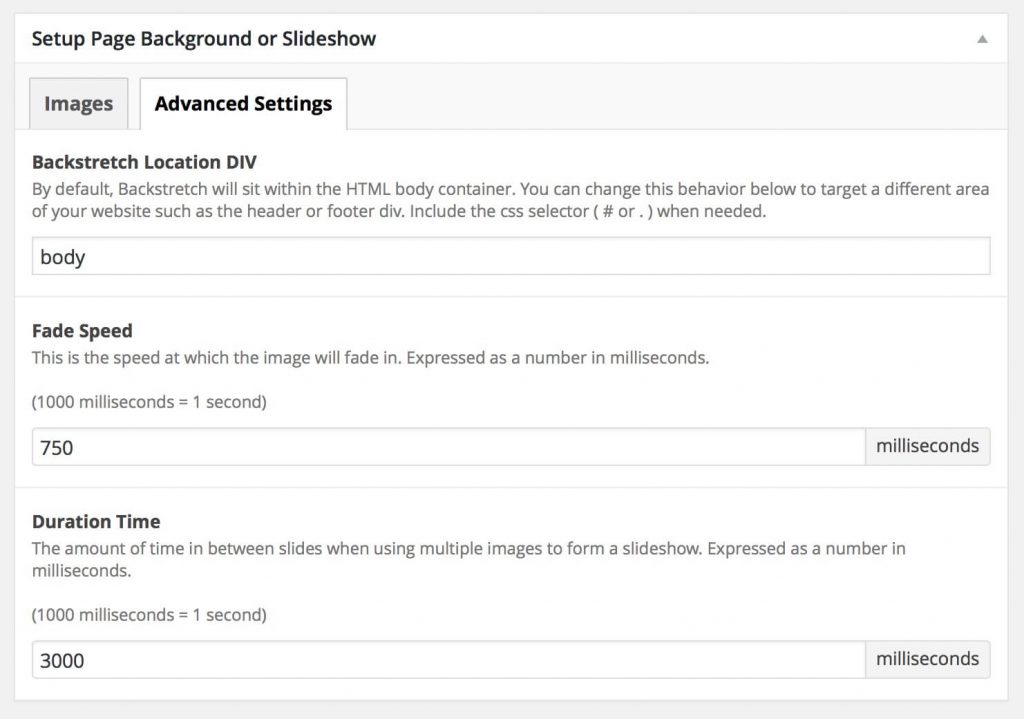
Backstretch Location DIV - This field is where you will specify the location where we will place the background image(s). By default this will be the page body container; however, you can specify any block level element within your page body such as the header, footer, sidebar, menu, etc.
For most users, the body will be enough as they want the page background to be different. Another advantage is perhaps you have a featured area between your header and main content area. This could be used there as a full page background section just as an example.
To figure out which location you want to target, you will need to inspect your page using your browser inspect tools and locate the div.
When entering your location, make sure to also include the "." for Classes and "#" for IDs. Example: #header, #main-content-wrapper, .sidebar.
Fade Speed - This is the amount of time the image will fade in. If using multiple images, this will be the fade transition speed as well.
Duration Time - If using multiple images, this will be the time each image is displayed before rotating to the next.
FAQ:
The Image(s) are not shown on my website:
Depending on how your theme is designed, the default placement (body) may be covered by a background color or image of a higher level div from your theme’s markup. You can increase the level of where Backstretch is placed at by adjusting the “Advanced Settings” when setting up your images. Another option would be to remove the background css that is covering up where backstretch is being placed at. Use your browser’s element inspection tool to determine the appropriate placement and what you may need to do to accommodate your theme’s default styles.
What Post Types does this work with?
Post and Pages.